Syncing production audio is one of the most tedious and time-consuming post-production tasks.
I’ve already written about my preferred method—using DaVinci Resolve’s auto-sync feature—which allows you to batch sync an entire day’s worth of footage in one click.
Yet syncing in Resolve isn’t always the best option for your overall workflow.
If you’re planning to use Premiere’s built-in proxy workflow, which requires that proxy and full resolution media have a matching number of audio tracks, then creating synced proxies in Resolve flies out the window.
Or, in some scenarios, you may be shooting in an edit-ready codec like ProRes or DNxHR and simply don’t need to create proxies.
On the feature I’m currently cutting, the DIT transcodes proxies as he offloads camera cards, but he doesn’t receive the day’s production audio until after wrap, which makes syncing on set impossible.
So, what do I do in these scenarios…
Sync in Premiere.
Many people don’t realize that Premiere actually has its own batch sync tool hidden in a feature you’ve likely used many times already—Multi-Camera Source Sequences. Many seasoned Premiere editors choose to edit with multi-camera clips.
Personally, I prefer to take the syncing process one step further and create merged clips. I realize this may come across as a bold statement to many Premiere editors, and I’ll explain in detail why I prefer merged clips over multi-camera clips. There are some pretty significant reasons that may change your outlook if you’re muli-cam proponent.
While not nearly as robust as Resolve, I’ve found that Premiere almost always gives me better results than third-party plugins, without the hassle of having to pay an additional fee or switch between software.
It’s also fast and easy, so let’s get started!
Set Yourself Up for Success
While it’s extremely rare to find errors with timecode syncing (unless of course your timecode has drifted), Premiere can have a hard time with audio waveform syncing if your scratch track quality is poor or the sync sound has a low volume.
Talk to both your DP and on-set sound mixer and let them know you’d prefer to have both jam-sync timecode AND a reliable scratch track running.
Sometimes the budget will only allow for the scratch track. If that’s the case, talk to the sound mixer to ensure that the levels are set properly to match back to the production audio.
Get Organized
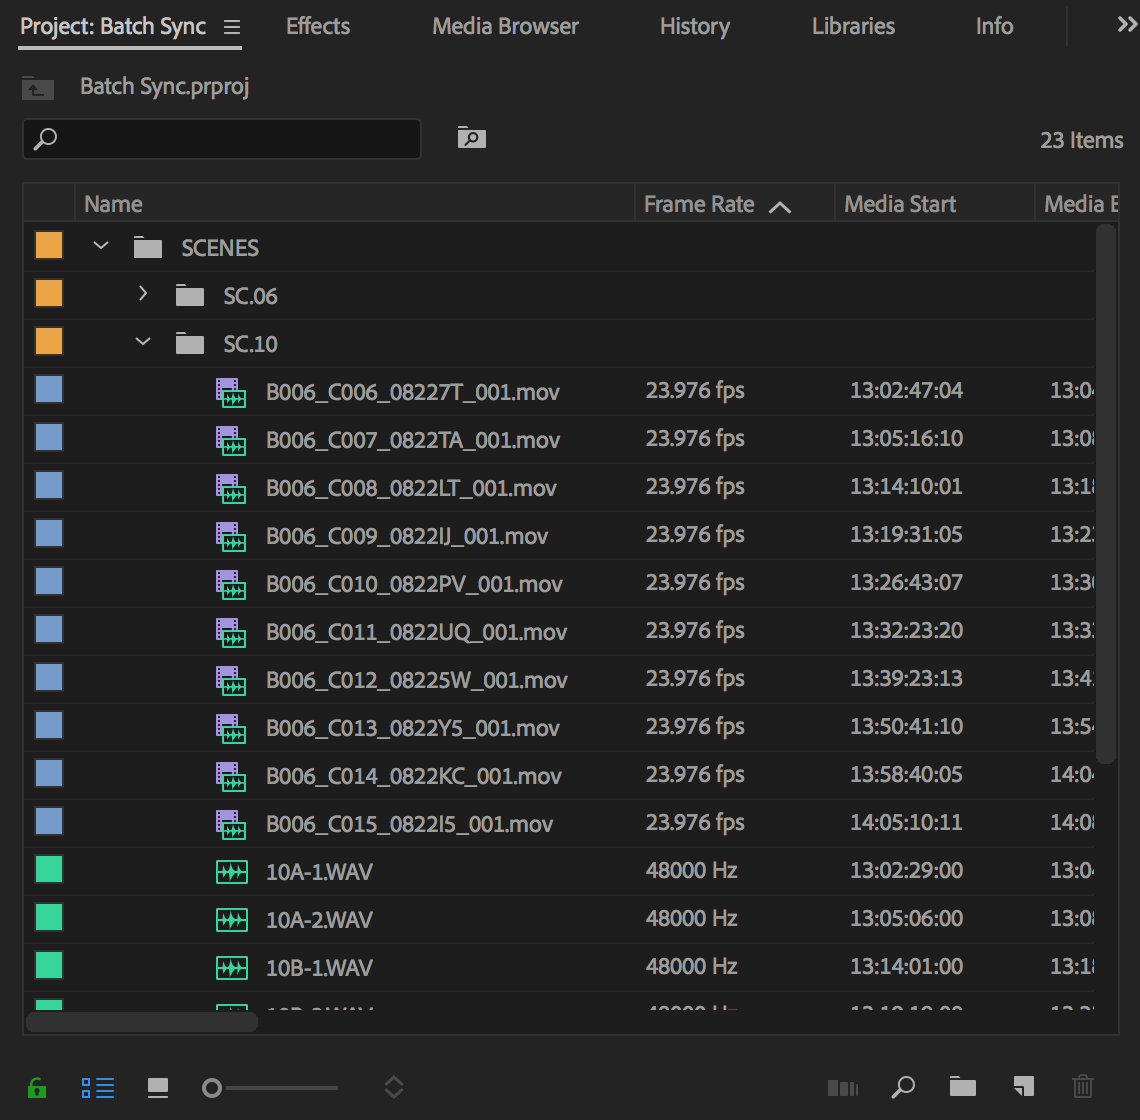
In Premiere, I recommend having all of your raw footage organized into scene bins, with both the audio and video in a single container folder.
While you can sync in batches larger than a single scene, I find it easier to keep track of and fix any issues working with smaller batches of footage.
Plus, if you’re syncing by waveform rather than timecode, you’ll tax your system if you attempt to sync an entire day’s worth of material at the same time.
Sync by Creating Multi-Camera Source Sequences
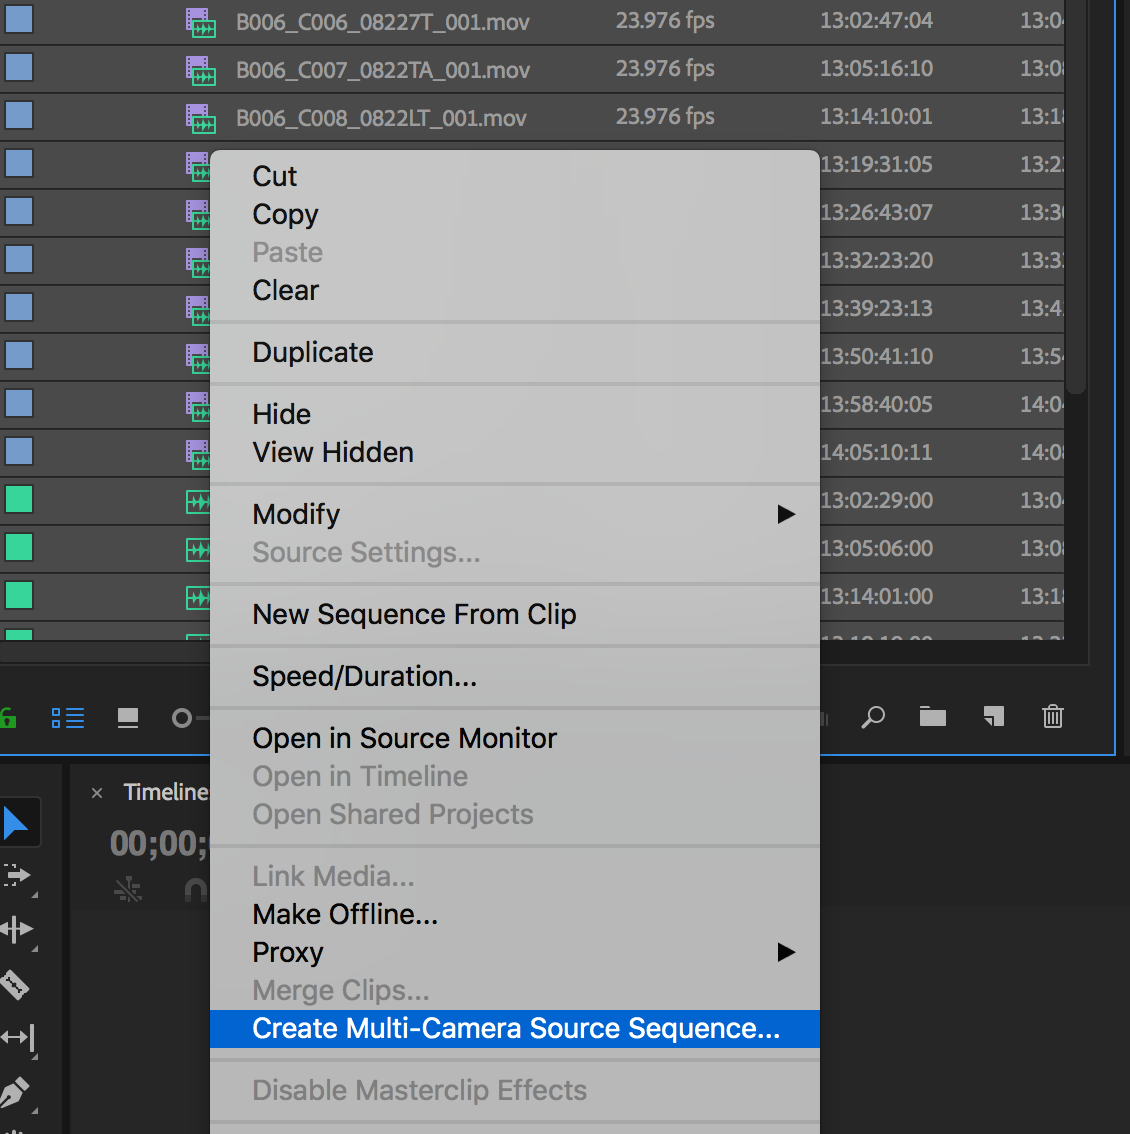
Once you’re organized, simply highlight the video and audio clips for the scene, right-click, and choose Create Multi-Camera Source Sequences.
A settings box will come up with a number of options for the clips you’re about to create.
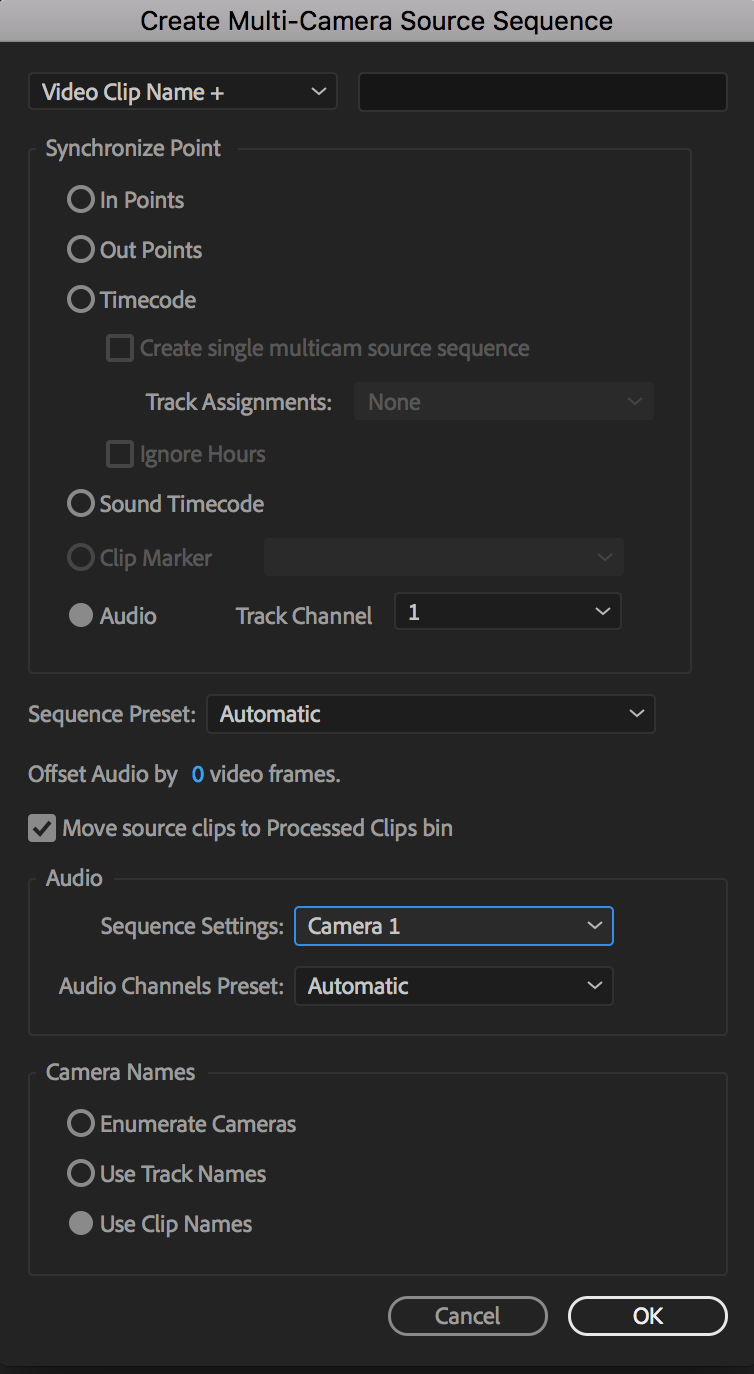
We can leave most of these settings alone. But, if you’re so inclined, at the end of this article I’ve included an Appendix which briefly runs through what they affect.
Sync!
Once you’ve got your settings selected, hit OK and let Premiere get to work.
If you’re syncing by timecode, the results should be instantaneous, whereas if you’re syncing via audio, you’ll see a progress bar as Premiere analyzes the tracks.
In either scenario, you’ll soon see new multi-camera sequences populating your bin, with your raw audio and video moved into a Processed Clips bin, if you selected that option.
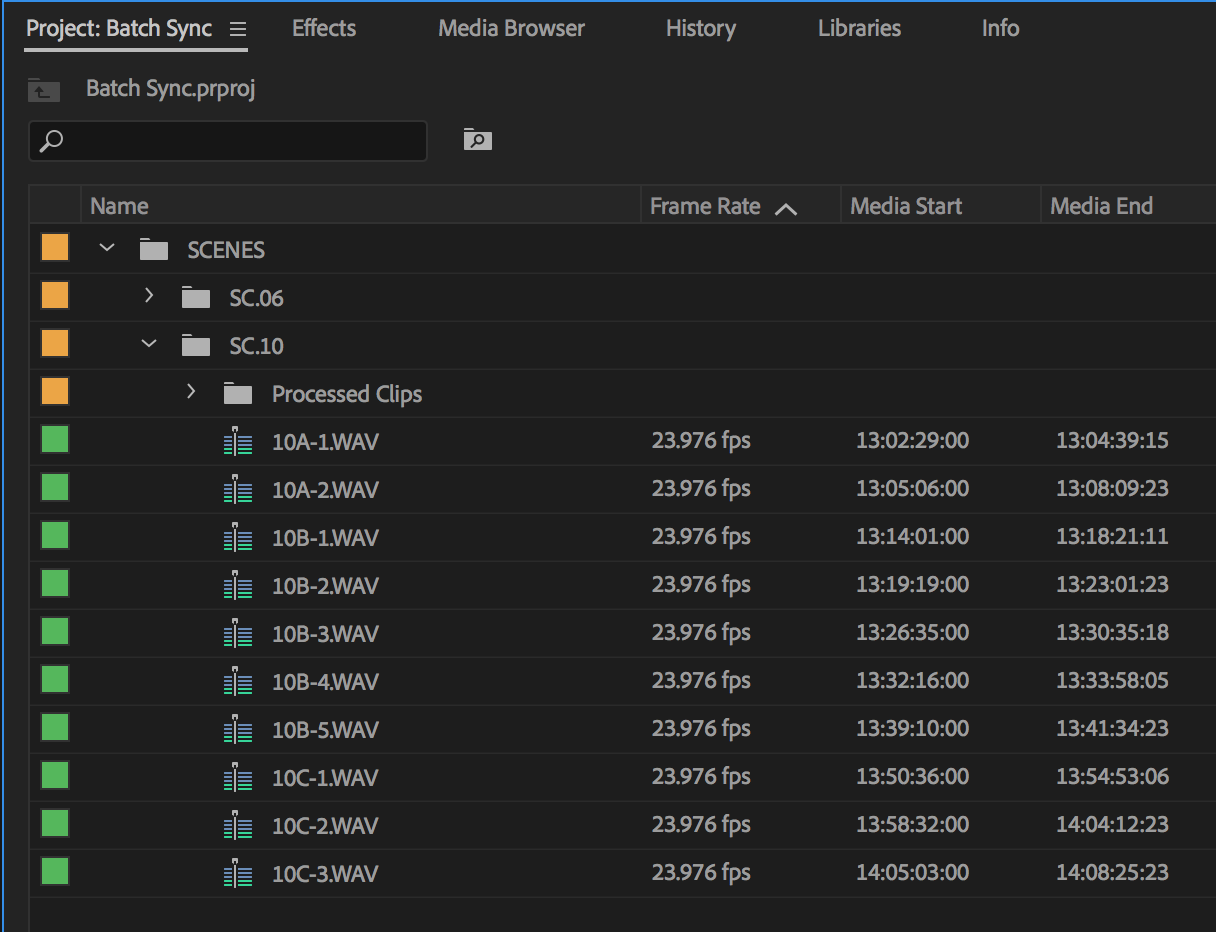
Premiere just batch synced an entire scene in a couple of mouse clicks!
Go ahead and load a few clips into the source monitor to take a look.
You’ll notice that the clips display a yellow box around them because we’ve just created multi-camera source sequences, which are generally used in scenarios where multiple cameras sync to a single audio track.
The yellow box signals which camera is currently active. In our clips, we’ve only got one camera, which is selected by default.
Technically, once you’ve reached this point and have a bin full of synced multi-camera clips (and potentially even labeled, if your production audio did the work for you), you can hang up the towel and jump right into the edit if you’d like. But, as I mentioned above, I prefer to take this one step further and created Merged Clips. I’ll first explain the “how,” and then get into the “why.”


