If there’s one thing NLEs get wrong, it’s syncing. Avid, Premiere Pro, FCP X – none of them allows for batch syncing without caveats. On longer projects, syncing individual clips quickly becomes both tedious and a big waste of time and money.
But it doesn’t have to be.
DaVinci Resolve has come packaged with expert batch-syncing capabilities for years – you can sync an entire day’s worth of footage with a single click. And while many editors have taken advantage of the software, many more still think of it as a complicated, high-end color correction tool.
In this article, you’ll learn how to seamlessly integrate Resolve into your post-production workflow, allowing you to quickly and easily sync video to audio recorded on a separate device.
We’ll cover batch auto-syncing by both waveform and timecode, how to make adjustments to your synced clips, and manual syncing.
Why Sync in DaVinci Resolve?
First and foremost, it’s free! And extremely powerful.
I’ve found Resolve to not just rival, but surpass, paid programs like PluralEyes in both speed and flexibility. No other program gives you three methods of syncing while also allowing for easily baked in LUTs and color correction, trimming, and transcoding, all in one.
Resolve is both easy to learn and is the fastest way to churn out synced dailies on a deadline. It allows me to import edit-ready files into my NLE and get right to work – no labeling or manually matching audio and video files required. As a feature film editor, I teach this method to my assistants and have used it flawlessly on countless projects.
Even if you’re not familiar with the software, you’ll likely feel comfortable pretty quickly, as Resolve moves closer and closer to resembling a full-fledged NLE with every new release.
Just this month, Blackmagic unveiled a major update to the software that includes tons of new features, improvements, and a drastically lower price point for the paid version.
Download and Install the Software
Download the latest version of DaVinici Resolve right here. Two options will be available for download: DaVinci Resolve and DaVinci Resolve Studio. We’ll be working with the first one – the free version – which is powerful enough for almost all syncing situations.
DaVinci Resolve 14 (in public beta) is currently the most recent version and is referenced in this article.
Create a Project and Import Media
Launch Resolve and choose New Project from the project window.
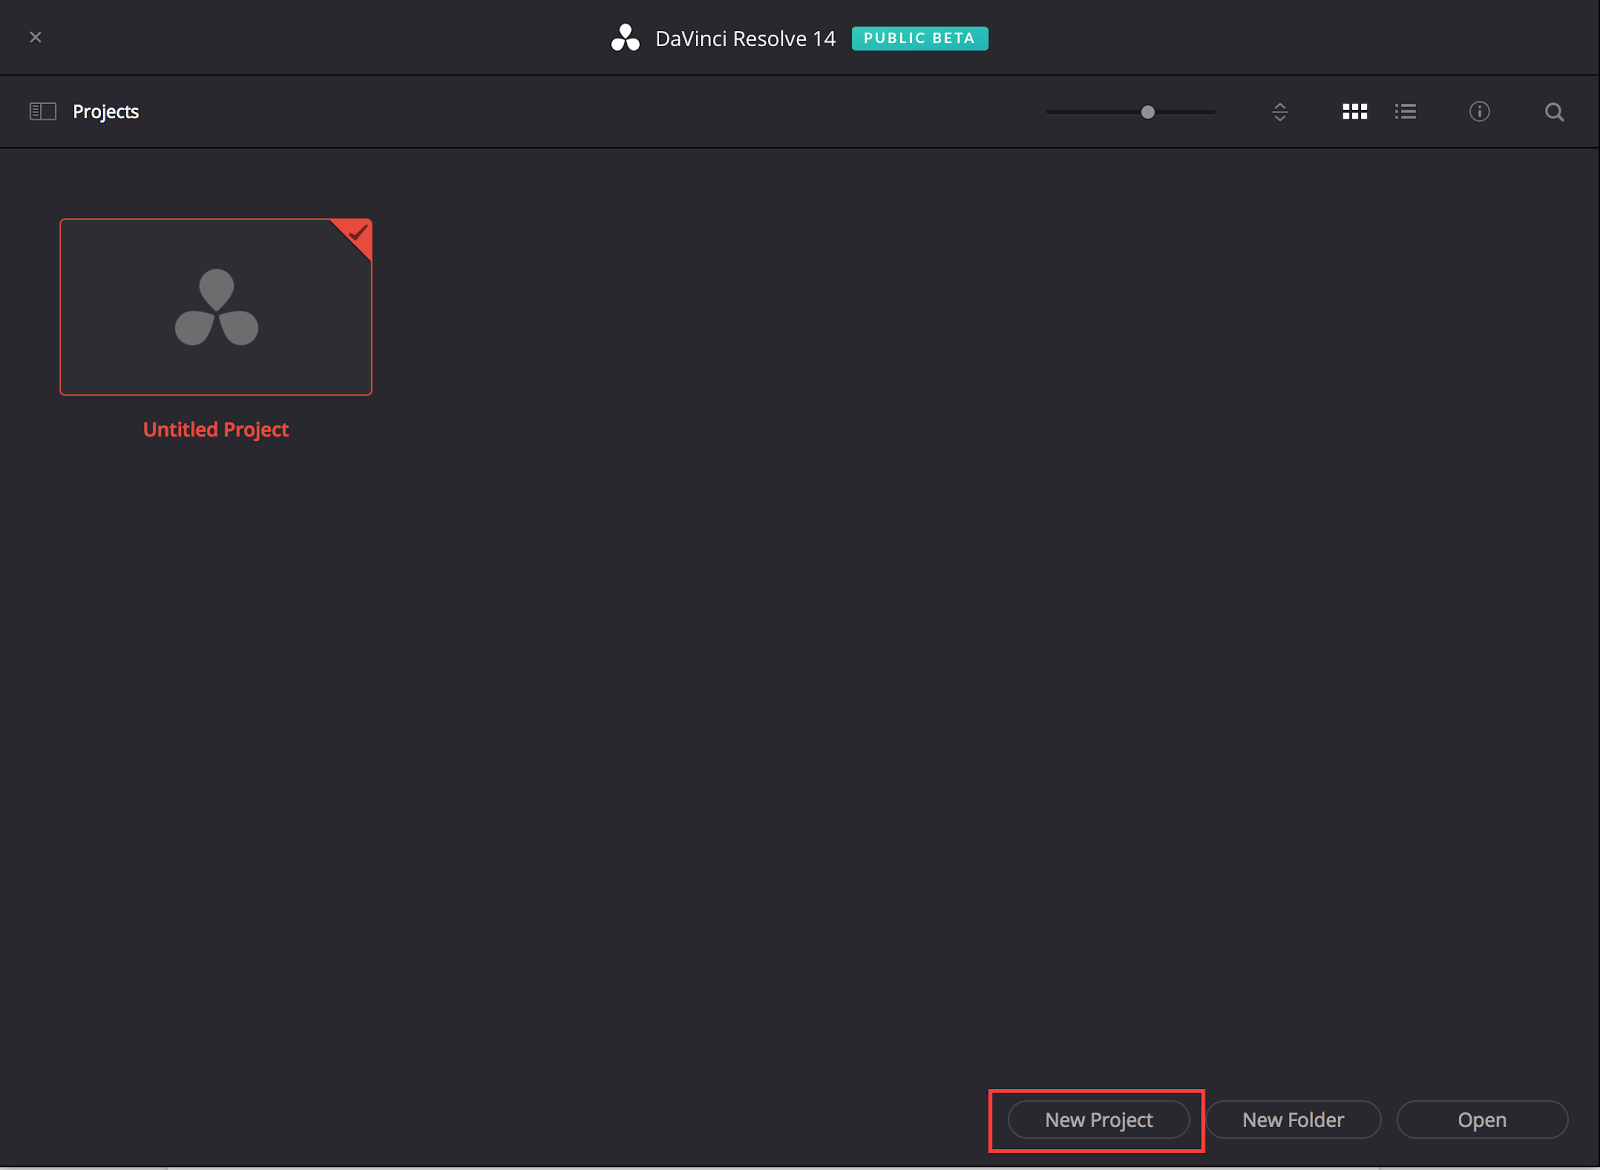
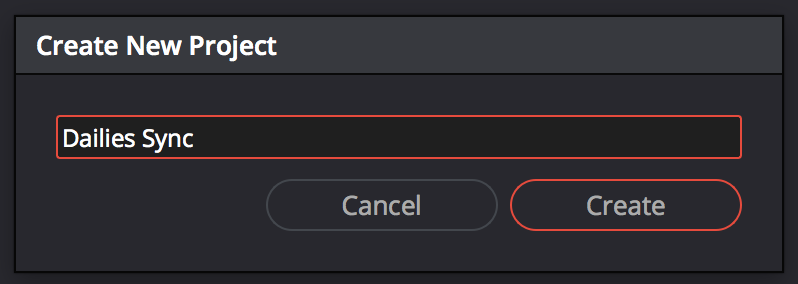
Name your project when prompted and hit Create.
Double click your new project to launch it.
The Resolve interface is organized into five different tabs, which you can switch between in the menu bar at the bottom of the screen: Media, Edit, Color, Fairlight (new with the release of DaVinci Resolve 14), and Deliver.

If it’s not already selected by default, click the Media tab to begin importing media.
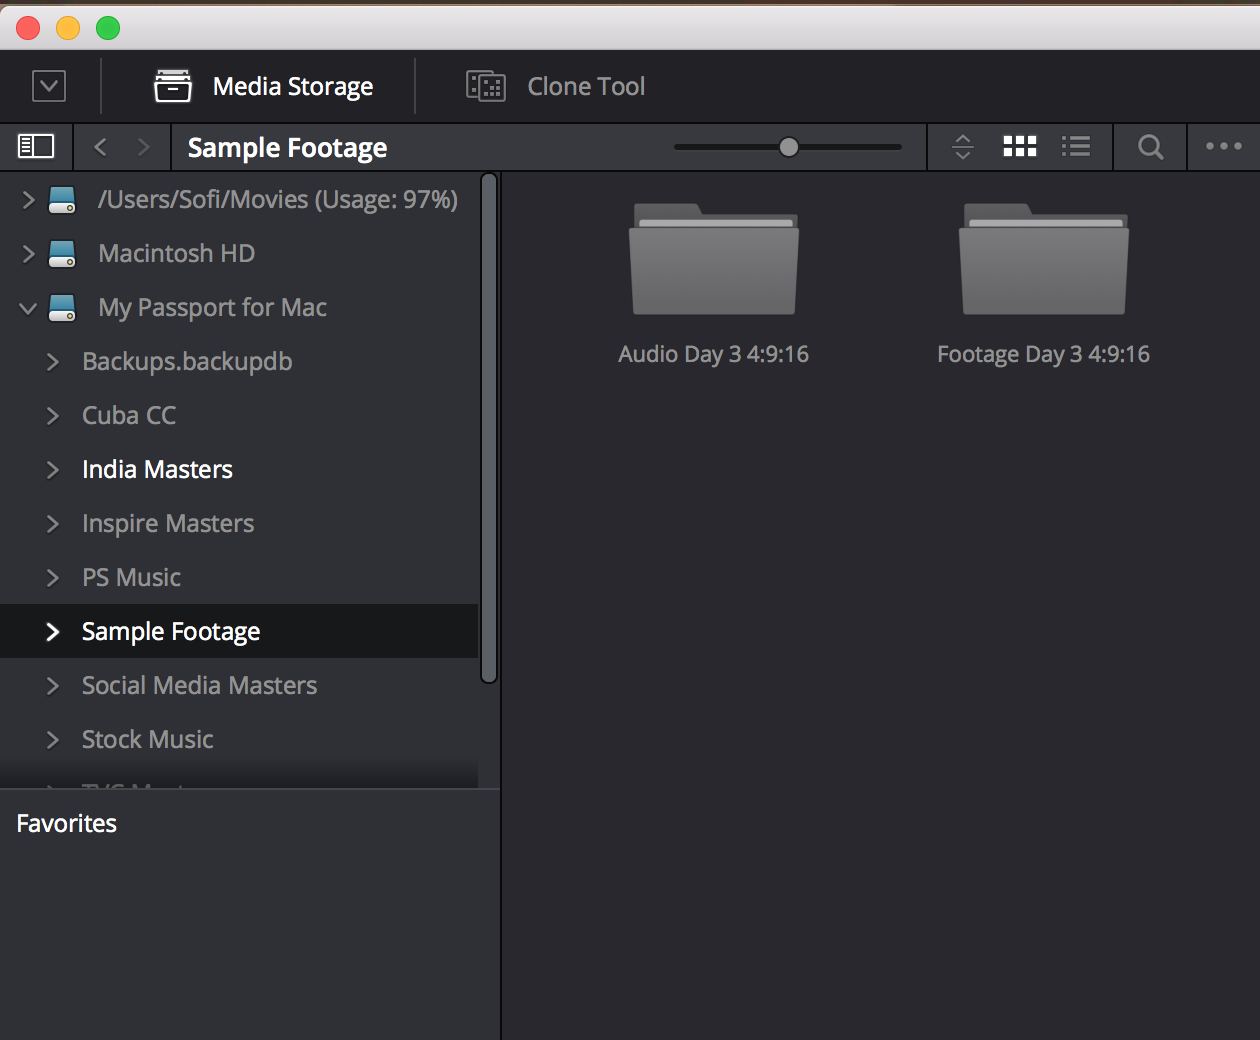
In the top left corner, you’ll see the Media Storage Browser, which lists all the available hard drives you have connected to your computer, and allows you to browse to locate your footage.
Below that, you’ll see the Bin List area, with a default Master bin.
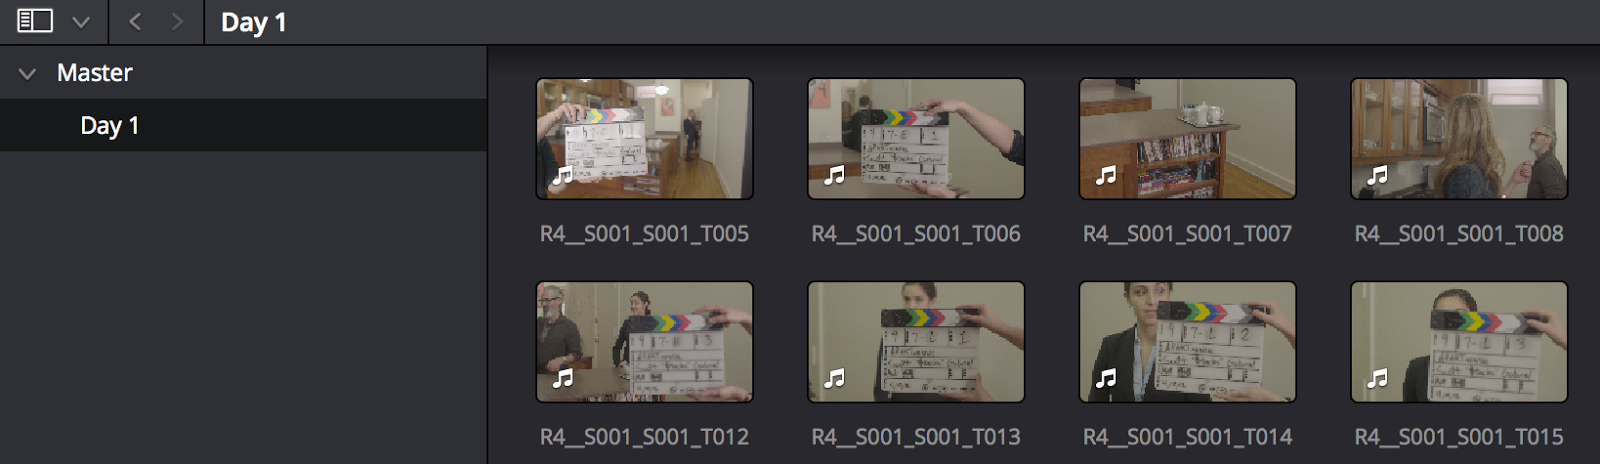
To keep my media organized, I like to add new bins for each shoot day of the project I’m working on before importing, labeled simply as Day 1, Day 2, etc.
To add a new bin, right click anywhere in the gray space in the Bin List and select Add Bin from the context menu, or use the keyboard shortcut shift+⌘+N (or shift+ctrl+N on Windows)
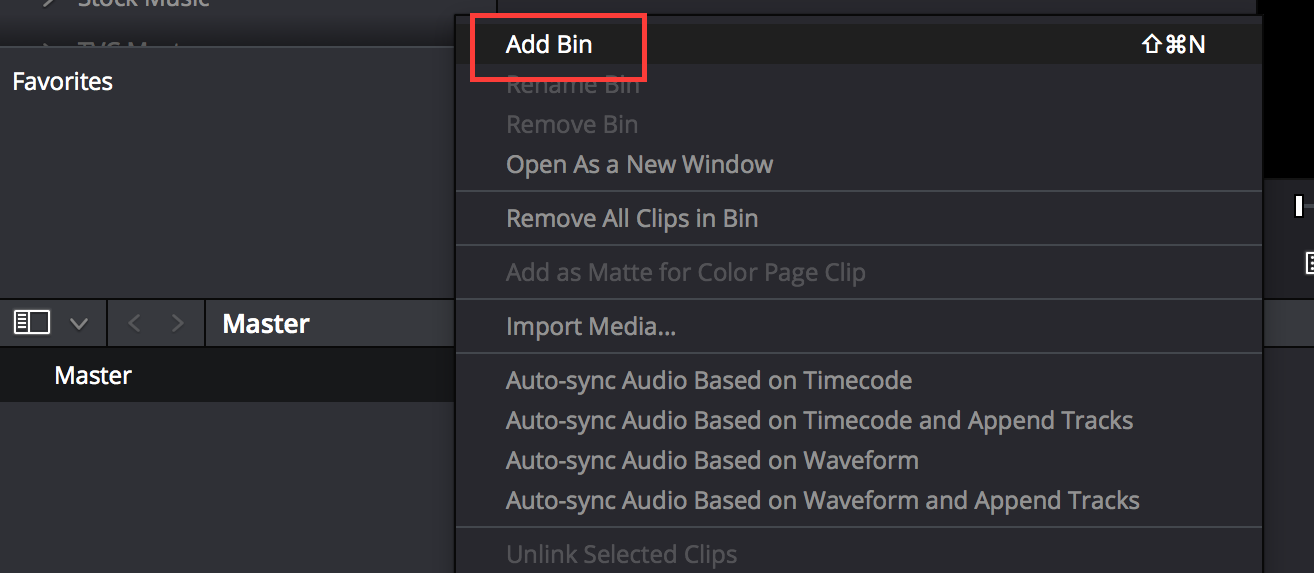
A new bin will be added under the Master category. I’ll name mine Day 1, since I’ll be syncing footage from the first day of a short film shoot.
You can choose to organize your footage however you want, but I strongly suggest syncing in small batches, no more than a single shoot day at a time. Resolve can handle larger bins, but spot checking and fixing issues become more a hassle when dealing with a large amount of clips at once.
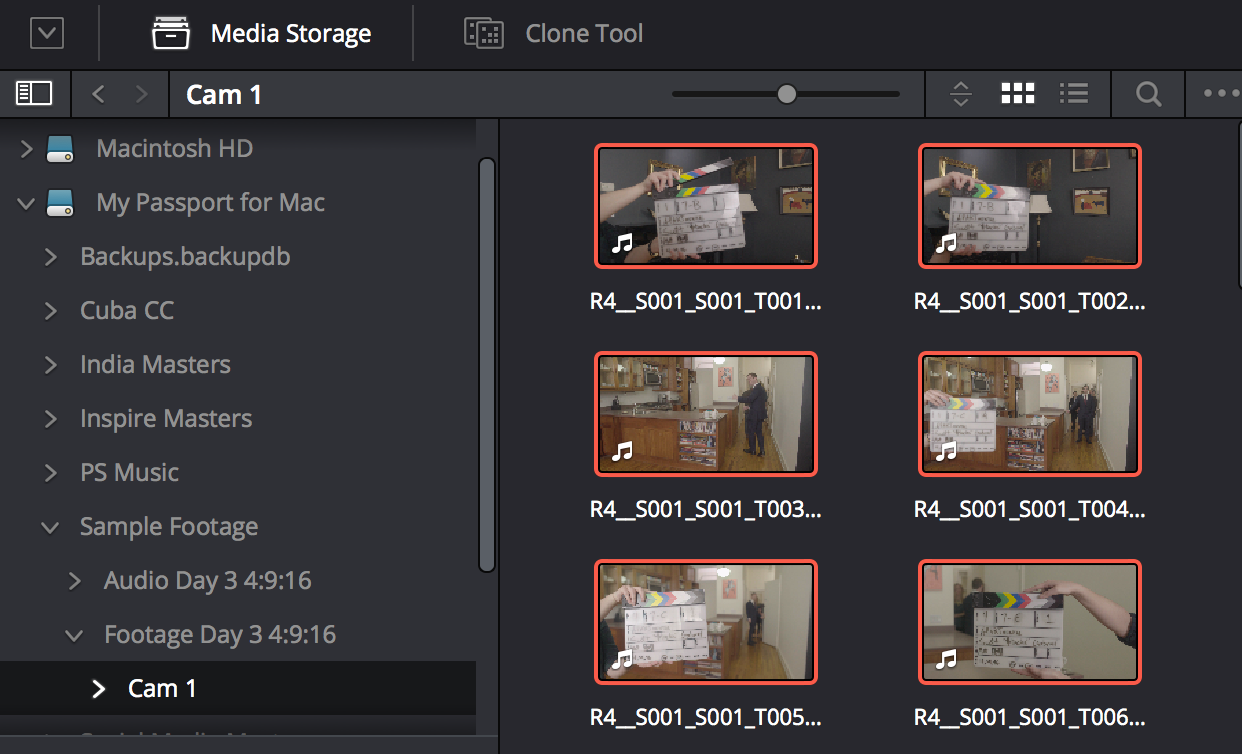
Back in the Media Storage Browser, navigate to the video footage you’d like to import. Use the keyboard shortcut ⌘a (or ctrl+a) to select all video clips in a folder, or click and drag to select specific clips.
Once selected, drag the clips on top of your bin to import them. If you haven’t adjusted the default project settings, then you’ll likely see a frame rate mismatch warning, asking if you’d like to adjust your project’s timeline settings to match the incoming media’s frame rate.
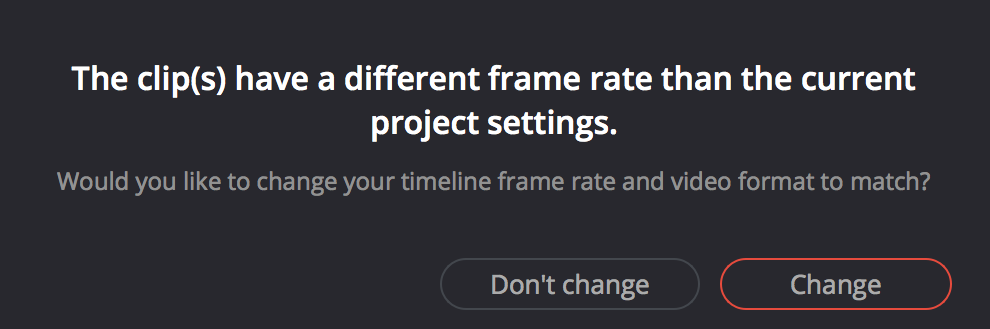
In almost all cases, you’ll want to do this by clicking Change.
The imported media will now be available in the Media Pool, which contains all of the media that you bring into the project.
Since we’re syncing clips, we’ll need to import our audio files as well.
To take advantage of auto-sync, we’ll need both our video and our audio files to be contained within the same bin, which we can do in one of two ways, depending on your organizational preference:
- Import both audio and video footage into the same, single bin.
- Import audio into its own bin inside of the video bin. Right click on your video bin and choose Add Bin from the context menu to create a new bin inside of it.
Both options work the same, but I generally prefer to import both audio and video into the same bin. I find it reduces the amount of mouse clicks needed if I need to adjust clips or sync manually.
Once you’ve made your choice, navigate to your audio files back in the Media Storage Browser, and import your audio the same way we imported the video, by dragging the clips to the appropriate bin.
Use the Inspector to Note Audio Channels
Now that we’ve got both our audio and video imported, let’s note some useful information that’ll help us verify our sync later.
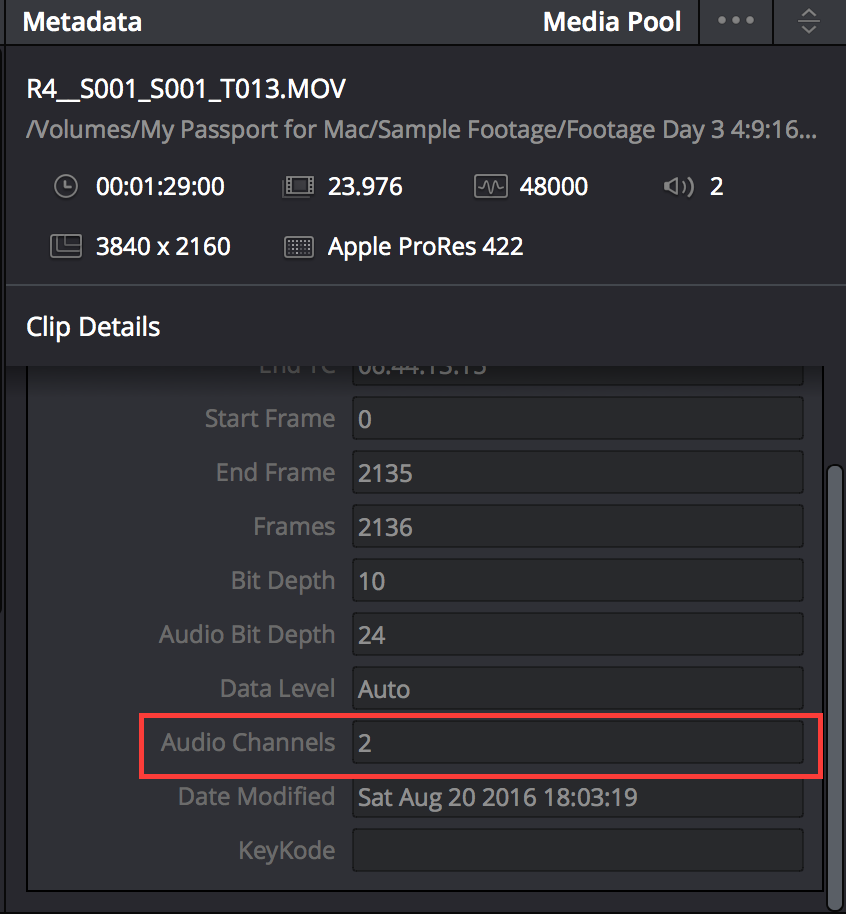
Select the bin containing your video clips and click on any clip. You’ll notice that the inspector to the right of the Media Pool populates with information about the clip.
Locate the Audio Channels heading and note the number of embedded audio channels your video clip has. The clip I’ve selected has two channels. Remember that if you’re working with jam sync timecode, it’s possible your clip may not have any audio channels if no scratch track was recorded on set.
Now, select any one of your sync audio clips. Again, the inspector will populate with the clip’s metadata, and we can see that the audio clip I selected has 7 channels.
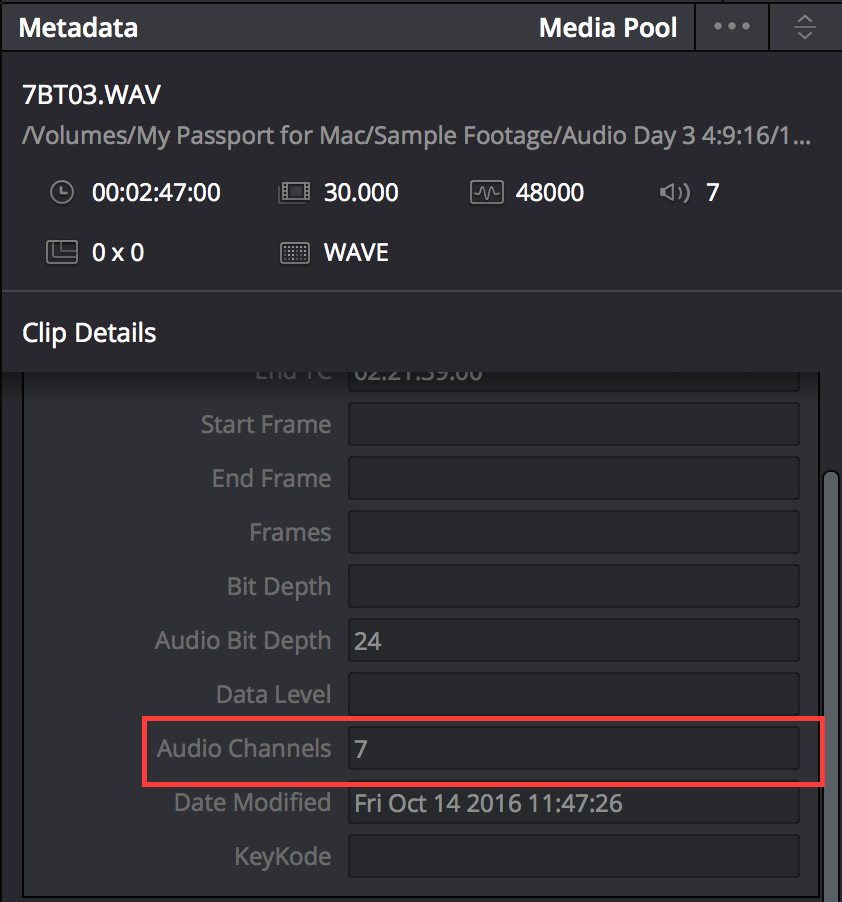
I suggest clicking through a few different audio clips since, depending on a scene’s mic set up, they won’t always all have the same amount of audio channels.
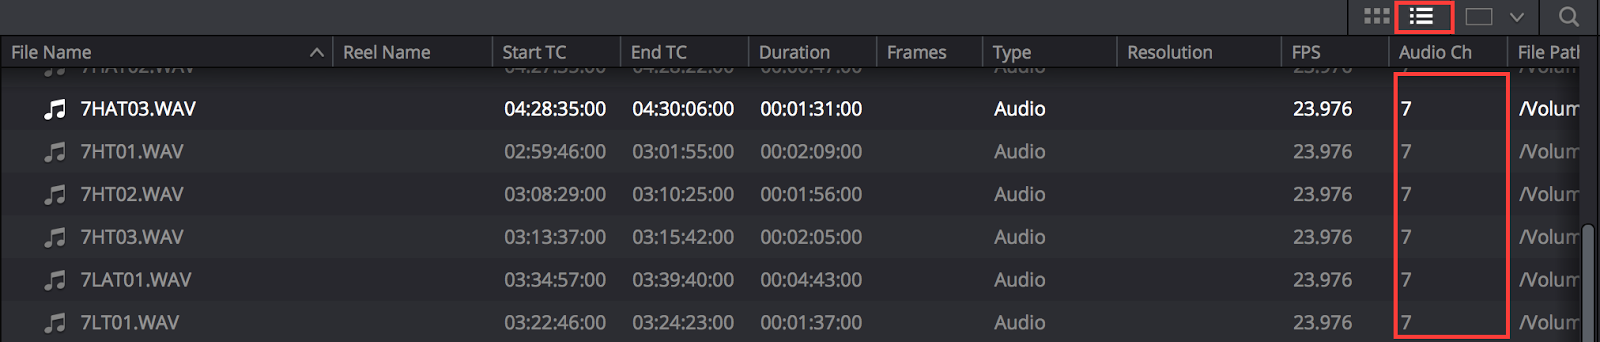
You can also see information about all of your audio clips at a glance by switching to list view in the Media Pool. Click the list view button and then look for the Audio Channels metadata column. To switch back to icon view, click the icon button to the left of the list view button.
So, what do we do with this information?
We now know that our camera media has 2 embedded audio tracks, while our sync sound files have 7. We can expect that once we sync our audio and video together, we’ll have somewhere between 7 and 9 audio tracks in the synced clip, depending on whether or not we choose to keep the embedded camera audio available as a scratch track.
Now that we know what to expect, let’s start syncing.


