Author’s Note: This is an unsponsored review. This article may contain affiliate links.
Earlier this year, Sohonet reached out asking if I’d like to test drive their hardware-based real-time collaboration tool, ClearView Flex.
Thanks to the pandemic, I was right in the middle of a remote feature film edit, giving me the perfect opportunity to test out ClearView Flex as an editor working from home.
Sohonet’s ClearView Flex offers:
Real-time creative collaboration on editing, VFX and content production – from any location, on any device.
ClearView Flex enables an ‘over-the-shoulder’ shared viewing experience – when your collaborators are in different cities or continents.
Stream live, encrypted video streams in real-time from any source via HDMI or SDI to your team members and clients and enable them to review and approve content from anywhere on their tablet, phone, PC/MAC or via Apple TV.
So does it deliver?
The short answer: ClearView Flex offers top-notch streaming quality and wonderful ease of use, but falls short when it comes to collaboration and affordable pricing. ClearView Flex is well suited for users who are working in a high budget studio environment and need broadcast-standard color accuracy or high-quality audio feeds (think: colorists, VFX artists, audio mixers), but likely isn’t the best choice for independent editors or smaller post-production houses.
If you’re considering taking the plunge or just want to know how it all works, read on for the full review!
Table of Contents
Pricing
It’s no fun reading through a review only to find out that a product is completely outside of your budget, so here’s Sohonet’s pricing on the ClearView Flex right up front.
There are two ways to pay – and unfortunately, neither are cheap.
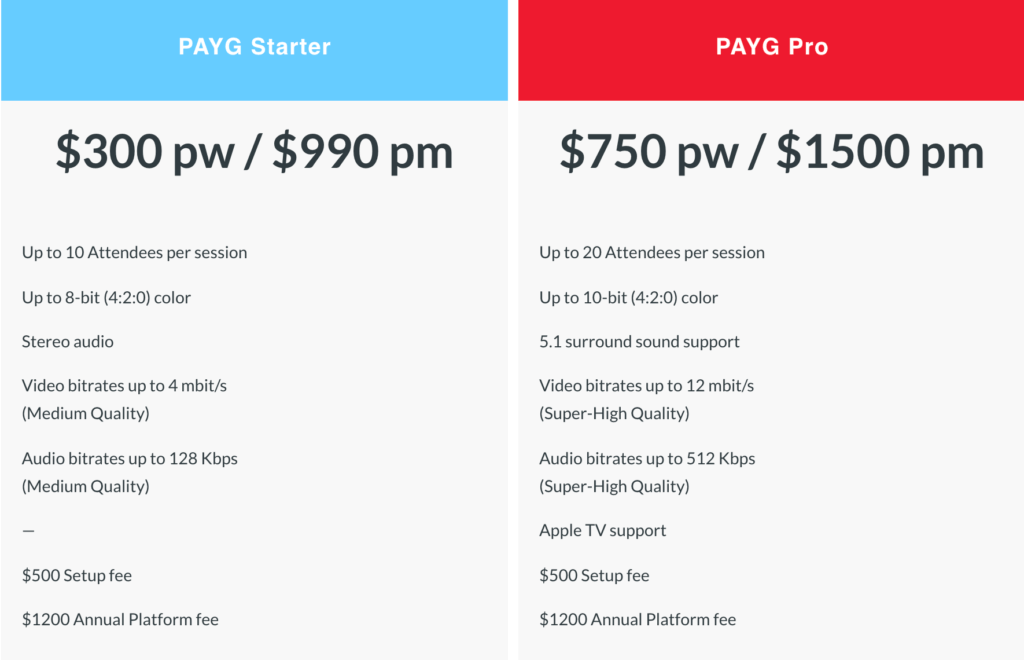
- Pay as you Go: Users pay an Annual Platform Fee ($1,200) to rent the Flexbox hardware, and can purchase weekly or monthly credits to activate the service as needed.
- Subscriptions: Users choose either a standard 12-month term or short-term option. There is an Annual Platform Fee ($1,200) to rent the hardware which allows users to keep the Flexbox for up to 12 months regardless of the contract term.
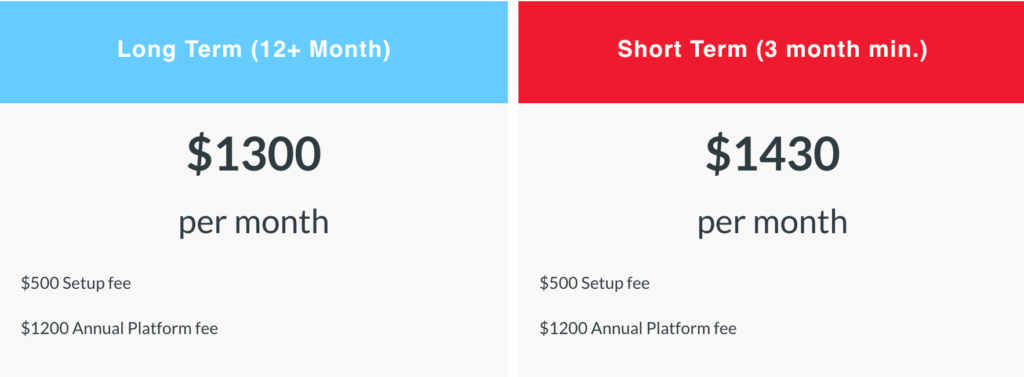
With any plan you’re looking at a $1,200 yearly fee, a $500 set up fee, and then a flexible weekly or monthly fee ranging anywhere from $300/wk to $1500/month, depending on how often you use the service.
So again, not cheap. Now that that’s out of the way, let’s talk about how ClearView Flex actually works.
Setup
The Flexbox
My first impression: the Flexbox is BIG. Much, much bigger than the Blackmagic Web Presenter or ATEM Mini, my top choices for streaming hardware.
The Flexbox is a standard rack-mount sized piece of equipment. It ships well-packaged and comes with a power cable, ethernet cable, and an HDMI or SDI cable, depending on how you plan to connect.
If you’re a post-house or have a dedicated office with an equipment rack, then the size likely won’t be a problem, but if you’re a freelancer who works from home or likes to travel, the size can become pretty prohibitive.

Regardless, setting up the Flexbox is very simple – just plug in the power cable, connect the box to your network via ethernet, and then connect a video feed from your workstation.
Tip: I used this extra-long ethernet cable to move the Flexbox closer to my computer and still connect to my router.
When you turn on the Flexbox, you’ll immediately hear a very loud fan cycle, when will shortly quiet down into a softer, but still pretty audible fan. I suggest moving the box at least a few feet away from your workstation for noise control.
So, what’s in the Flexbox?
According to Sohonet, it’s currently outfitted with a full-sized Blackmagic DeckLink capture card. A company rep mentioned that they’re working on outfitting a smaller box with a mini DeckLink card, which would be a huge plus for portability. This “desktop” version of the Flexbox should be for available for testing in January 2021.
Creating an account and onboarding
Once I had the box connected and ready to go, I got on a call with Sohonet’s tech support to set up an online account and make sure that my Flexbox was able to connect to their streaming platform.
Setup took all of 10 minutes, and the rep confirmed that my Flexbox was properly online. Then he took me through a test session to show me the ropes and explain how to stream on the ClearView Flex website.
A/V output from the NLE
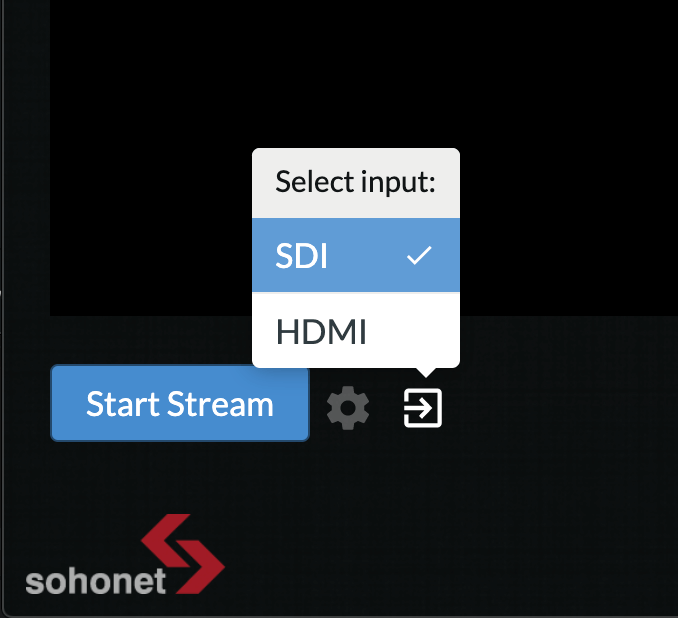
There are two ways to connect your workstation to the Flexbox:
- SDI (input resolutions up to 2K)
- HDMI (input resolutions up to 1080p)
Tip: You can connect both SDI and HDMI inputs, with the option to switch between them while streaming. This feature is useful for sharing both your NLE’s video output, as well as your entire desktop to screen share bins or the timeline.

If you’re using a breakout box like a Blackmagic UltraStudio Mini Monitor or AJA T-Tap, then setup is super easy – connect your video output to the Flexbox and you’re immediately ready to stream in either 8-bit or 10-bit color accuracy!
Of course, you’ll need enough network bandwidth to support the higher quality streams, but if you have it, the Flexbox can be a particularly useful tool for reviewing color correction or VFX work (as long as your viewers use a calibrated monitor).
Unfortunately, I wasn’t using a breakout box and was connecting to the Flexbox directly via my computer’s HDMI port (my UltraStudio Mini Monitor was packed up in storage since I was in the middle of a move).
Initially, my entire desktop was streaming via the Flexbox, which may be ideal for those who like to share their NLE’s bins and timelines, but that isn’t how I like to work. Plus, the Flexbox was picking up the frame rate from my desktop, rather than from my NLE.
I wanted to stream just the output monitor from Premiere so that my collaborators only ever saw my source monitor or viewer. I also wanted to stream Premiere’s audio feed, but not any other computer sounds.
For better or worse, here’s where Sohonet’s support team gracefully bowed out of the setup process. Understandably, the rep I was speaking to was more familiar with SDI feeds, as well as Avid troubleshooting versus Premiere.
To be fair, those in a studio environment probably won’t run into this particular setup issue. However, many editors currently working home are much more likely to be using minimal a/v hardware.
Since the Flexbox was indeed up and running, I decided to troubleshoot on my own to set up the ideal workflow.
Correcting the video output was easy. I simply needed to turn off mirroring in my MacOS display settings (effectively making the Flexbox a second monitor) and then select the Flexbox as my video output in Premiere.
The audio routing was a bit trickier. To feed audio to the Flexbox, I had to set Premiere’s audio output to DisplayPort (HDMI). Premiere’s audio then streams via the Flexbox, but stops playing back on my computer for monitoring. Obviously no good for editing.
Loopback audio device
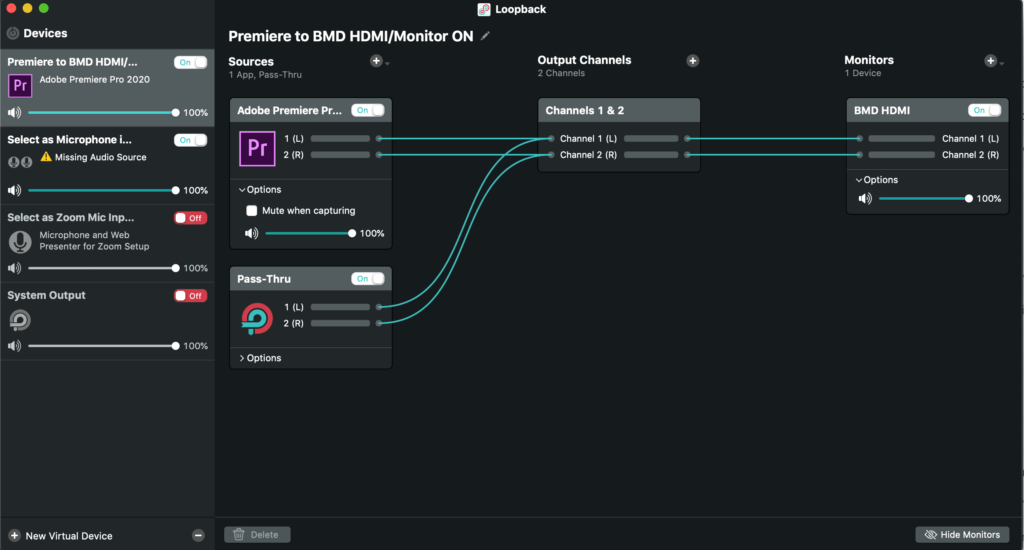
Using Rogue Amoeba’s Loopback ($100), I set up a simple virtual device sending audio from Premiere to the Flexbox (“BMD HDMI” in the image below) and then unchecked “Mute when capturing,” so that Premiere’s playback passed through to my headphones.
Solved! I just need to select this virtual device in Premiere as my audio output.
All in all, it’s a pretty simple solution for those who want to connect directly via HDMI, but the extra setup and potential expense involved are likely turnoffs for those looking for a plug and play experience.
Bandwidth suggestions
The last consideration during setup is your network bandwidth.
For the editor, Sohonet recommends at least 20Mbps of upload bandwidth for uninterrupted streams. They also suggest that you limit other activity that may tie up your internet while streaming.
On the viewer’s side, only 2-7Mbps are required to watch the stream, depending on which quality settings are used.
If either side experiences a poor connection, the stream will drop some frames to make sure that the playback on both ends remains in sync, rather than having the editor’s stream continue on, while the viewer’s stream lags a few shots behind.
Note: In my tests, I ran the Flexbox off a residential internet connection (connected to a router via ethernet) of about 10Mbps upload/200Mbps download speed.
Enjoying this article? Subscribe for more exclusive content!
Streaming a Session
Here’s where ClearView Flex really shines!
Setting up a stream is incredibly simple. You don’t need to install any software, you just need a web browser. Currently, Chrome and Firefox are the two supported browsers, though Sohonet recommends Chrome for the best experience, so that’s what I used.
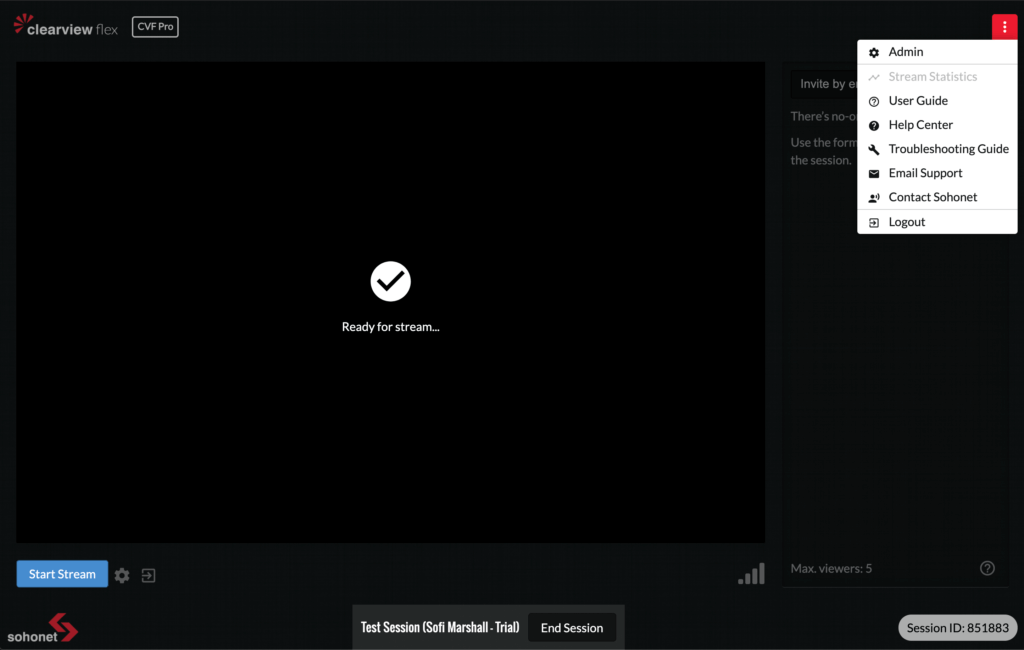
With the Flexbox connected, you simply navigate to the ClearView Flex website, log in via your account, and the video player will communicate with your Flexbox to set up a new streaming session.
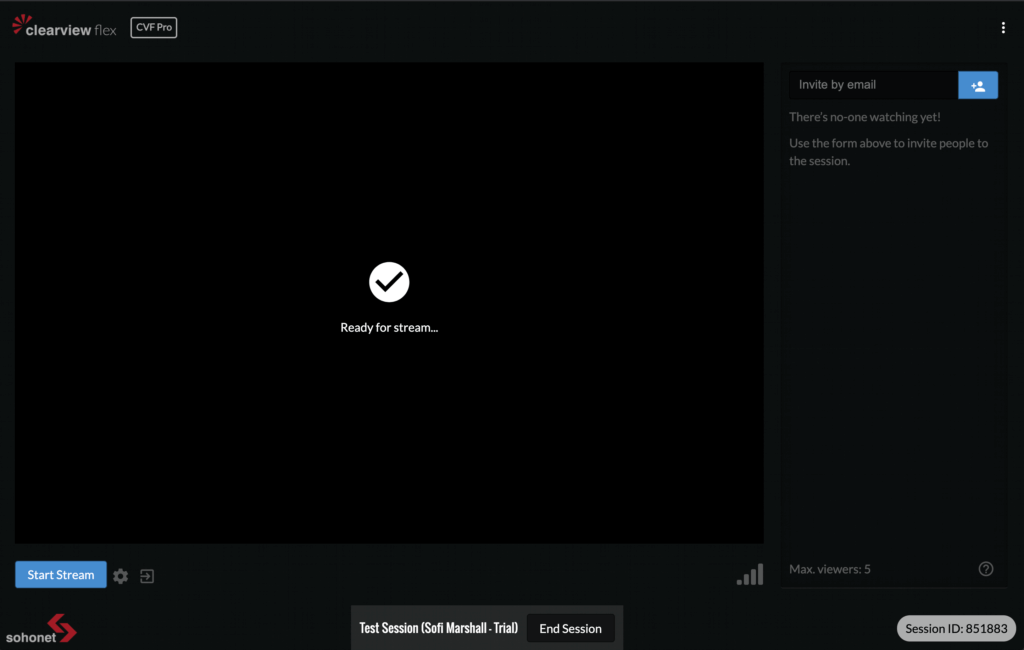
The streaming interface is simple and clean, with buttons to start streaming, select the streaming input, control the streaming quality, and invite collaborators.
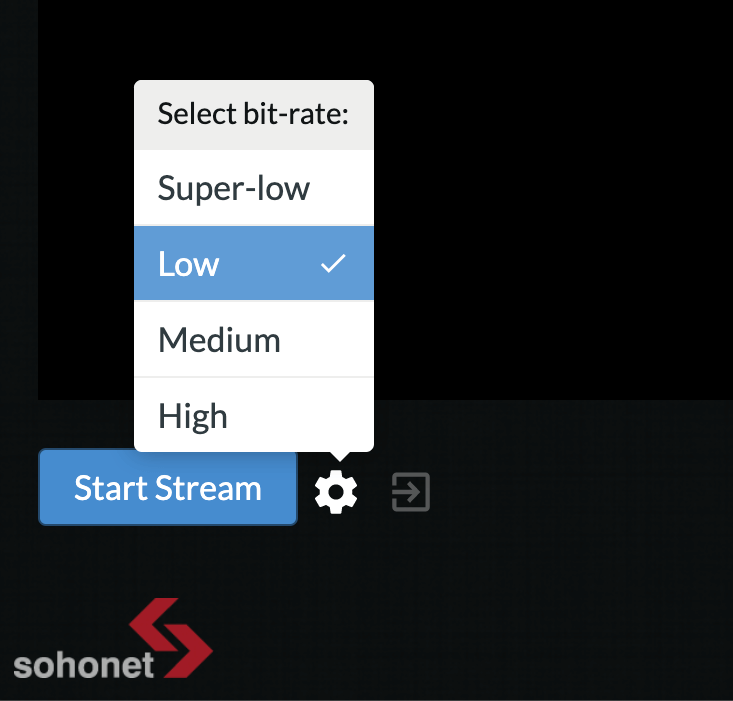
Tip: A super-high steaming quality is now available to pro level accounts, but requires a minimum 12Mbps connection for viewers.
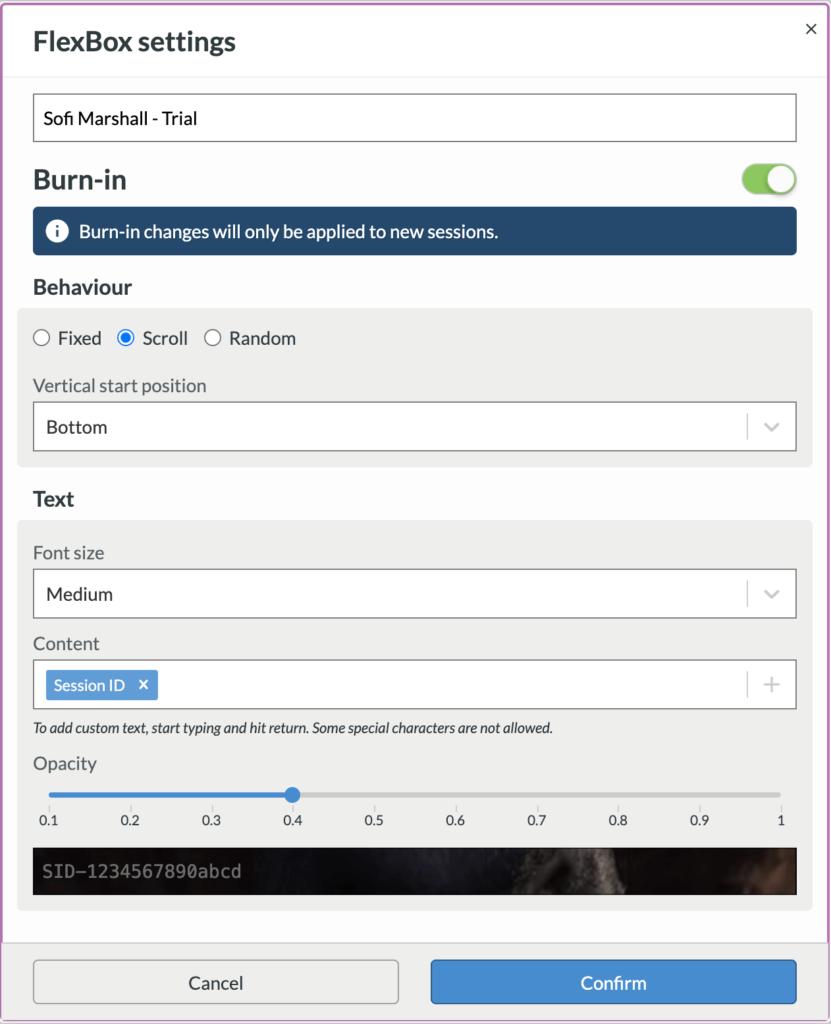
Admin controls
There’s an admin dashboard located in the top right corner, which includes options for adding custom burn-ins to your stream. These features are great for added security!
Once you’ve chosen your preferred settings, clicking “Start Stream” should bring your NLE’s video feed into the player.
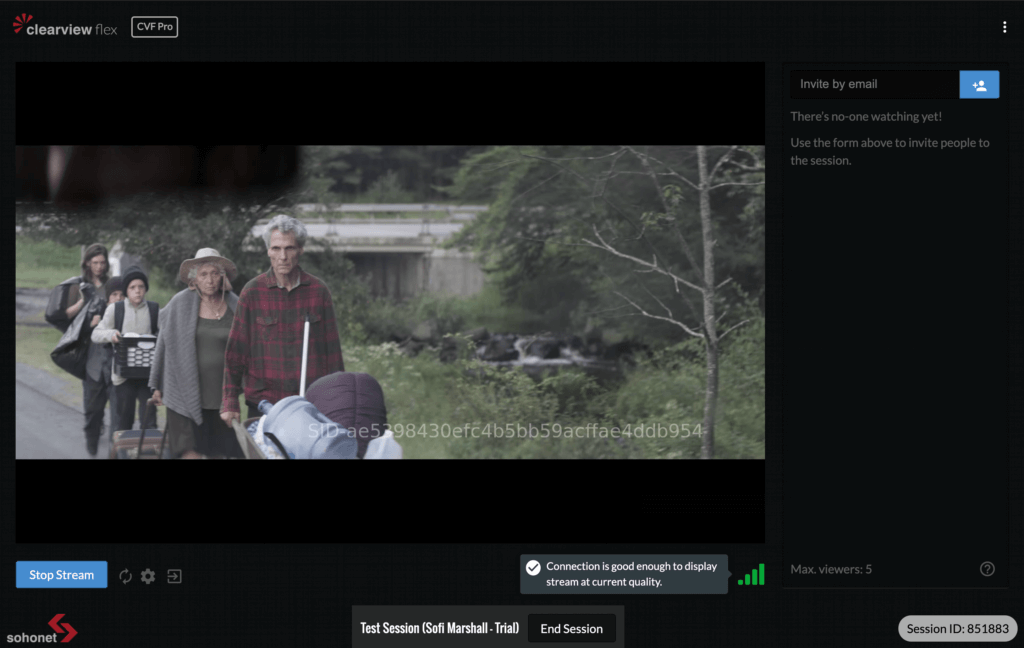
Tip: After starting the stream, make sure you mute the audio in the player on the ClearView Flex website, or you’ll hear two out of sync audio playbacks. Hover over the player to reveal the mute button.
Inviting viewers
Once your stream is up and running, you’re ready to invite viewers to your session. Once again, ClearView Flex makes it easy:
- For desktop and Andriod, viewers just need the Chrome browser to watch streams.
- For iPhones and Apple TV, viewers can download the ClearView Flex app from the App store.
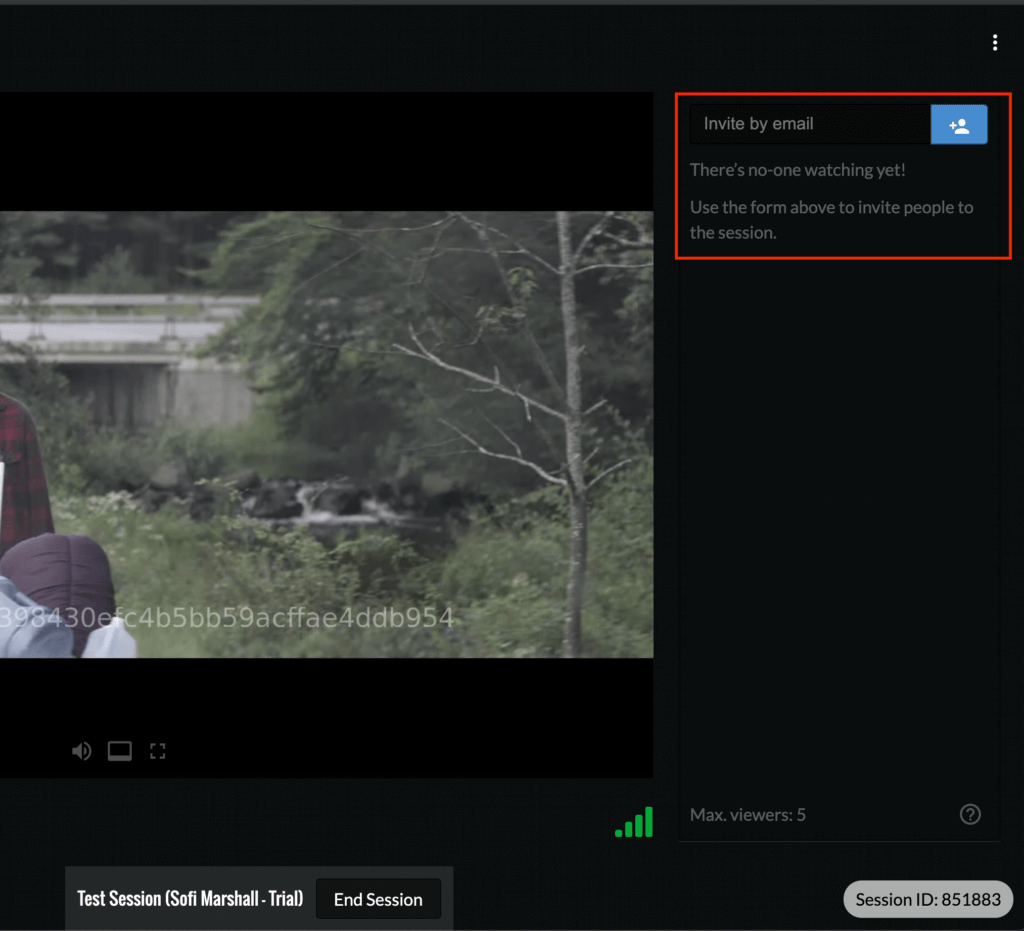
Just add your collaborator’s email address and they’ll be sent a unique invitation that’ll remains active for 30 minutes.
Quality
The stream quality is fantastic. Since there are multiple quality options, all but the slowest internet connections will find a video setting that works well.
On my consumer home internet connection, I was able to stream at both low and ultra-low qualities with no significant issues.
I did follow Sohonet’s advice and limit internet usage to make sure I didn’t have any interruptions. When I tested out the medium and high quality streams, I did experience lag, but I expected that.
Even on the ultra-low and low settings (which simply lower the video bit-rate), the picture looks and sounds great. In particular, the audio playback is very clear, since it uses full signal 2-channel stereo audio.
Tip: The AppleTV app currently supports 5.1 surround sound playback. Otherwise, the Flexbox will downgrade a 5.1 mix to stereo.
Collaboration?
Unfortunately, here’s where things start to fall apart for ClearView Flex.
You’ve got your high-quality stream up and running and your collaborators are watching with you in real-time. Great!
But how do you talk to each other?
There is currently no integrated audio or video chat bundled with ClearView Flex. This is huge! Viewing an edit session in real-time isn’t very useful if you can’t actually collaborate.
Note: Sohonet is currently working on developing an integrated push to talk voice chat for desktop and laptop (no mobile or AppleTV support yet), expected in the first half of 2021.
So what are the options here?
Sohonet suggests getting everyone on a conference call and then splitting up two pairs of headphones so that one ear can hear the conference call, while the other ear is hearing either the NLE’s playback (for the editor) or the Flexbox stream (for viewers).
Not exactly an ideal setup for long term editorial work, is it?
Other options include using Zoom or Facetime, which will work, but will fight for network bandwidth, while also adding a third interface into the mix (on top of your NLE and the ClearView Flex website for streaming).
Tip: Sohonet’s support team offers tips and best practices for using Zoom, Bluejeans, Microsoft Teams, and other video conferencing platforms.
Things get every more tricky if you’d like to take advantage of the AppleTV app, since any way you choose to conference call with viewers, you’ll end up hearing the NLE playback in the background (unless you constantly mute and un-mute yourself).
I ended up using Zoom for my tests, since my collaborators are already used to it. It does work well enough, but navigating between Zoom and the ClearView Flex website is cumbersome. In addition, everybody has to use headphones, otherwise Zoom will pick up the NLE’s playback coming through the computer speakers.
For editorial work, I consider this lack of collaborative tools a dealbreaker. But for colorists or VFX artists who don’t rely heavily on audio playback for content review, hopping on a conference call may not be an issue at all.
The bottom line
Do I recommend ClearView Flex? Yes and no.
In terms of quality, ClearView Flex’s stream is top-notch. As long as both you and your viewers have enough bandwidth, you’ll get amazing video and audio quality.
ClearView Flex also gets big points for being super easy to set up and having a well-designed user-friendly streaming interface.
Unfortunately, ClearView Flex falters when it comes to true collaboration. The lack of integrated voice or video chat just doesn’t make sense for a product at this price point. Competitors Evercast and Bebop (both with similar fees) include these features, as does my $600 DIY remote-editing solution.
The Flexbox also loses points for practicality on two counts. First, the box itself is massive and needs to be hardwired via ethernet, making it unrealistic for most work-from-home setups. Second, the price point excludes all but top-tier users. This isn’t a service that any budget conscious production would finance lightly.
If you’re an independent editor or smaller post-house, skip ClearView Flex and instead get yourself a Blackmagic Web Presenter or ATEM Mini. Then, follow The Ultimate Real-Time Remote Editing Workflow for an all-in-one, portable, and affordable solution to remote editing.
If you’re a big-budget post-house or require remote broadcast-standard color accuracy, then ClearView Flex may be a good choice for its super simple setup, responsive support, high-quality streams, and end-to-end encryption.
To wrap it all up, I’ll say that the folks at Sohonet are listening and working hard to improve their service. The first half of 2021 promises the release of the smaller “desktop” Flexbox, as well as an integrated push to talk audio chat. These new features, paired with a truly indie-friendly pricing tier, would certainly make me take a second look at ClearView Flex.


